Windows Task Scheduler
On Windows systems you should use the Task Scheduler to run the Watch My Domains SED queue processor at one minute intervals.
This scheduled task runs the cron.php script periodically,
allowing the application to process the lookup queue and perform
scheduled checks such as domain lookups and monitoring tasks.
Overview
Setting up the task requires the following steps:
- Create a batch file that runs
cron.php - Create a VBScript file that runs the batch file in a hidden window
- Create and import a Task Scheduler configuration
Step 1 — Create the Cron Batch File
Use a text editor to create a batch file containing the following command.
Replace the paths to php.exe and cron.php with the correct
paths for your installation.
c:\xampp\php\php.exe "C:\path\to\wmdsed6\cron.php"
Save the file as cron.bat in the root folder of the
Watch My Domains SED installation.
Open a Windows command prompt, change to the Watch My Domains SED installation directory, and execute the batch file to verify that it runs without errors.
Do not continue until the batch file runs successfully.
Step 2 — Create a VBScript File
If the batch file is executed directly from Task Scheduler, a command window will briefly appear each time the task runs. To avoid this, create a VBScript file that runs the batch file in a hidden window.
Create a file containing the following code and update the path to
cron.bat as required.
Dim WinScriptHost
Set WinScriptHost = CreateObject("WScript.Shell")
WinScriptHost.Run Chr(34) & "C:\Users\Codepunch\Documents\Sites\wmdsed6\cron.bat" & Chr(34), 0
Set WinScriptHost = Nothing
Save this file as cron.vbs in the root folder of the
Watch My Domains SED installation.
Test this script from the Windows command prompt before proceeding.
Step 3 — Create the Task Scheduler Event
Copy the XML configuration below into a text file.
Update the path inside the <Arguments> section so that it
points to the correct location of your cron.vbs file.
Save the file as sed6.xml.
Step 4 — Import the Task
Open the Windows search box and type Task Scheduler.
In the Actions panel on the right, select Import Task
and choose the sed6.xml file.
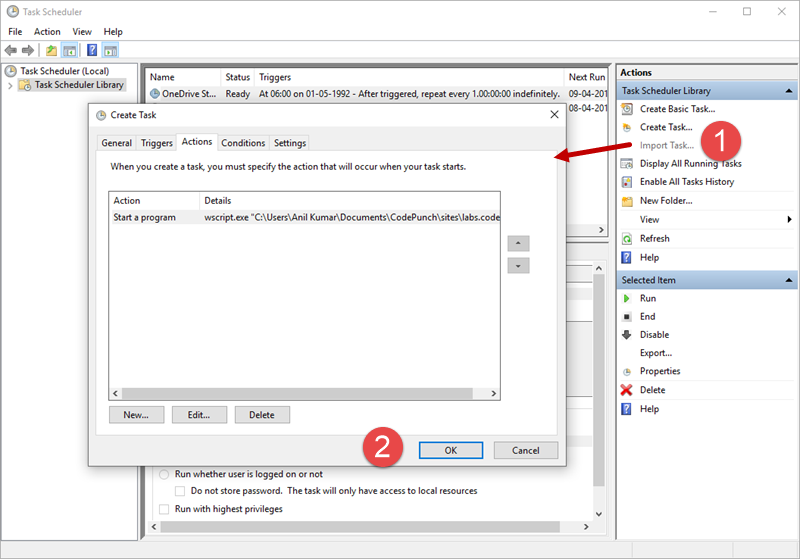
Review the task settings and confirm that the paths are correct, then click OK to create the task.
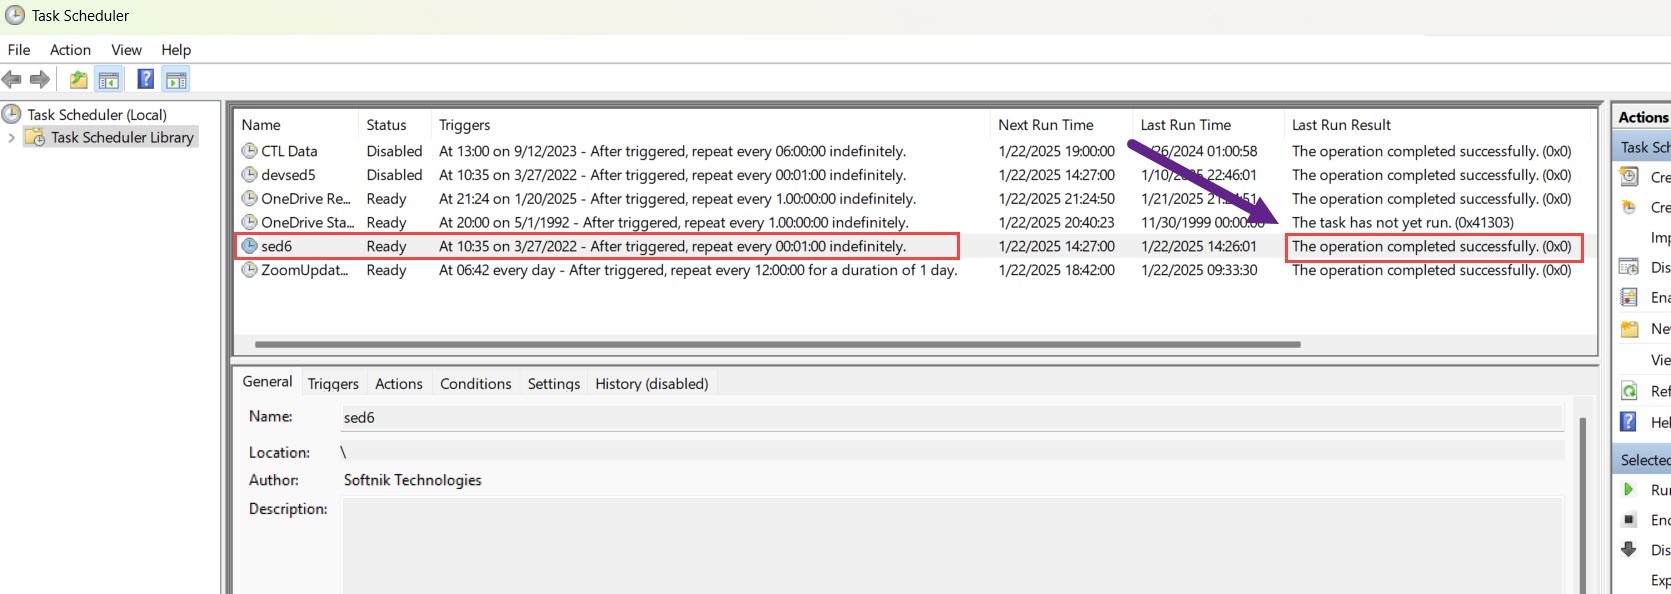
Verify the Task
After the task runs, confirm that the Last Run Result
column shows either:
Operation completed successfully0x0
This confirms that the scheduled task executed successfully.